
If you would like to see a short Halloween story with a few more digital art works go to Msartists Mixed Media Playground~ just click the link on the side bar and it will take you right there!

Saturday, October 31, 2009
Friday, October 30, 2009
Last Minute Halloween
 Image from NY Daily News / Martha Stewart
 At AllFreeCrafts.com you are sure to find some great ideas and tutorials for Halloween. Easy to do for last minute fun while waiting for the dark with the kids!
For all you bloggers out there you must drop by Confessions Of A Soccer Mom ! She has some spooktacular things on her blog. The 31 days of Halloween, recipes, domestic witchery, links to awesome Halloween fun!
Also stop by Msartist Mixed Media Playground (my alter ego) for some Halloween art and on Nov. 2 to see a Dia De La Muerta mixed media art work and blog post!
The queen of Halloween Martha Stewart~
Thanks for stopping by~ And come back to see the season change here at MsartistSewCrafty we will be having lots more going on. I have some guest coming with tutorials and more! Remember we are just getting started! ~
Monday, October 26, 2009
Costume Ideas
Are you looking for costume ideas still ?!
There is still time to gather your goods and be ready!
Here are a few ideas and links to make you a creative costume connoisseur ~
Blood Lust Vampire~via SistersOfTheMoon

Mother Time~via dirtybirdyvintage

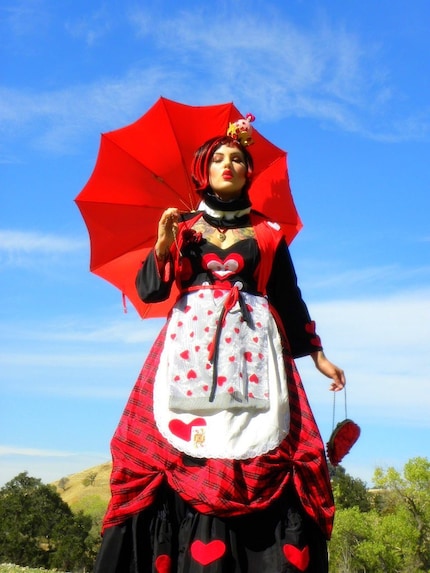
 Bride of Frankenstein and Queen of Hearts~via dirtybirdyvintage
Witches Hat~ via Mermaiden Creatio

Monday, October 19, 2009
Halloween Freebies and Fun

Here's a link to some Halloween freebies from Inspire me Thursday~ Check out their site of inspiring prompts each Thursday. They are also on twitter.
I can't believe I missed the Halloween Party this year! But it had been storming and our fence blew down on one side and other such brewing that kept me from participating in a great blog party. But you should go on over to Vanessa's A Fanciful Twist and see all the links of bloggers that are participating in her blog party. You are sure to have a howling good time!
Thursday, October 8, 2009
Dog Halloween Costumes

Looking for Halloween costumes for our pets I came across
this bulldog in the greatest costume!
It seemed to fit his personality to a tee!
The great thing about this costume is that It is good fitting
without being too tight fitting around his neck. Also It has no
choking hazards. The fabric seems lightweight
which will not to overheat the dog. And he can see and
breath with ease in this costume. Also
think about i if you walk around with your dog at night
have a reflective leash and collar.
Heres a couple of videos I came across that have lots of ideas for costumes for many sized dogs!
Wednesday, October 7, 2009
Halloween Crafts
Here is a link to Kristine McKay's website For other crafty fun and ideas ~ http://www.kmckaydesigns.com/ Don't forget to stop back by for some more Halloween inspiration and ideas! ~ There is still plenty of time to get in the spirit ~
Tuesday, October 6, 2009
Some fun is brewing~

I have been stirring the kettle, there is some fun brewing up right here for you~ So be sure and check back often as we are just getting off the ground. We will have some guests with links to their sites and stores. Also links to some special Halloween parties, web sites and other goodness that you may want to join in on! Crafting and much more~
Calling all crafters! Want to be a guest here or have a project you want to post with me~
Just leave a comment below with your email address and send me an email with a description of craft post or store you want featured and we can work out the details!
Monday, October 5, 2009
Welcome to my tips and tutorials blog~
 ~Welcome~
I wanted a place where I could give you some free tips, patterns and crafty inspiration. I love dabbling in crafts and sewing. I wanted to keep my mixed media art work and journal work separate. I also wanted to share some Holiday themed crafts and have a bit of fun with that! So I hope you enjoy the combination of fun and free! I will also be sharing crafty sites I love and give aways! If there is anything you are interested in that you don't see~ email me and I will reach into my hat and do a post for you or steer you to a site that has tips or tutorials in that area if I don't have it! I can't wait to share more~
Halloween Candy Bag Tutorial Steps 1& 2
You can make your own pattern out of pattern paper, tissue paper, tracing paper or if you are like me and don't have any I used the "thrifty method" of using newspaper.
 Top, Sides and below them bottom - You can make this any size as long as you add for seam allowances.
 ( 1 yard fabric needed, thread and grosgrain ribbon 7/8 ")

Here are my measurements for the larger bag:
1. For handles 2 pieces of fabric cut 4" wide x 25" long
2. For front and back of bag 2 pieces of fabric 12" wide x 14" long
3. For sides 2 pieces of fabric 6" wide x 11" long
4. For bottom of bag 2 pieces fabric 14" wide x 6" long
Make sure you allow the same amount of fabric for your seam allowances~ So if you use 5/8" add that to all your measurements.
With 1yard of fabric you will have left over material. I used mine for making bean bags. I will post an easy tutorial for that later. If you do the smaller bag you would have enough fabric left over for a Halloween pillow.
Step #1. Cut the fabrics listed above adding your seam allowances. Then press your seams over 5/8" or slightly more as long as you use the same measurement for folds on all fabric.

#Step 2. Next you will be sewing all your finish seams prior to assembly of the bag. Your finish seams to fold over, iron in place and sew are: The tops of the bag both pieces front and back and the top of both the sides of the bag.
Halloween Candy Bag Bottom Steps 3 & 4
Steps 3 & 4
Directions under picture~
 Image - Turned and ready to top stitch which closes turning hole~
 Image - right sides together and sew leaving 2" hole
#1 With right sides together match your fabric and stitch all the way around leaving a 2" opening for turning. Do the opening in the center and not on the corners. This will allow your corners to be clean. When doing your corners
#1b (tip) sew across the fabric when you reach the corner leave your needle in and lift the foot of the sewing machine and pivot to your new direction. Continue to sew until meeting your opening leaving a 2" gap for turning.
#2 Turn your fabric inside out. Clip the fabric at the corners on a diagonal.
#3Take it to the iron and press it flat.
#4 Go back to the sewing machine and top stitch the entire piece which will close the hole and give it a bottom finish~
Halloween Candy Bag Tutorial Step 5
Putting the bag Together
#1 Image of how to attach front, back sides to bottom pinned and ready to sew> Only sew what is necessary to attach and trim. ( 5/8" to 3/4")

 #2. Sew into place see directions step by step below~

 #1 Pin your Front and Back to the bottom of the bag ( larger parts connecting) with the wrong side of bag on top of the right side of the bottom of the bag ( so when your sewing is complete the seams are on the inside )


 #2. Sew into place see directions step by step below~
 #1 Pin your Front and Back to the bottom of the bag ( larger parts connecting) with the wrong side of bag on top of the right side of the bottom of the bag ( so when your sewing is complete the seams are on the inside )
Check yourself when you pin it! Sew into place.
#2 Now pin your sides to the bottom and place on each side ( smaller parts connecting) Sew into place.
#3 Now pin your Front to sides (check yourself) & pin your Back to sides. This makes your bag its shapes Make sure the right sides are together so the wrong side of the fabric is in the inside of the bag. This is easy to check prior to sewing by looking at it pinned! (see image below for example)
#4 Sew into place from Top of seams to bottom of bag. Do not sew too far into the bottom. ( just enough to connect the fabrics) That is why you sew it in this order! Ease of construction!
#5 Only trim as needed on the inside of bag - do not get too close to seams!

In this image you see the sides attached to the bottom I checked prior to sewing~ To ensure attached correctly. All seams on the wrong side of fabric~
Now go to how to add on handles to the finished bag!
Halloween Candy Bag Tutorial Step 6 ( bag handles)
Step 6
Bag Handles~
#1 To make the bag handles take your cut fabric and finish the ends by folding over the
seams ,ironing them and sewing them over 5/8" do this on both sides and on both the pieces of fabric.
( a total of 4 finished edges for the handles )

Then with right sides together fold over and sew a long tube.
 When done cut the threads and turn inside out~


 When done cut the threads and turn inside out~
When completely turned inside out take your two tubes to the iron. Fold them in half having the seam centered on the bottom and press them flat. Here is how it should look.


You will attach the handles about 2" from the sides of the bag on the front of the bag. ( have the seam face the inside of the bag )
Then you also attach the handles 2" from the sides on the back of the bag.
Sew handles on across two times for added strength! You can do this on the machine~


Halloween Candy Bag Tutorial Step 7 ( attaching the ribbon)
 Cut the ribbon and center where you want to place it. ( I added it to sides on larger bag)
 Sew into place ( when you tie a knot or bow with ribbon sewing won't show~
 Cut bottoms at a diagonal ~
 Tie in a knot or bow~
 Step 7 - Optional ~Easy Peasy!
 Halloween Candy Bag Tutorial Finished bags~

 Mini version~
  Larger Version~
 You can embellish with ribbons or bows. Or buttons and velcro closures if you wish!
 Hope you give it a try! It is all straight stitching and you can't go wrong~ Questions: Just email me and I will try and answer any you have. Happy Crafting~
Subscribe to:
Comments (Atom)
