Thursday, December 31, 2009

Ringing In The New Year

A toast to the New Year! Ringing in the New Year! New Years Day recipe below~
Vintage New Years Noise Makers

Happy New Year Everyone 2010 has arrived! I hope you have had a wonderful holidays and are looking forward to the new beginnings that will arrive~
I look forward to sharing more this year with you. If you didn't know; I love scrap booking and journaling!! I have made a few scrapbooks and have some to do for Wedding gifts this year. I look forward to sharing what I am learning on the way, layouts that I have done and useful links.
Do you love to scrap or paper crafts or journaling? Do let me know. I have seen some fabulous work out there in blog land! If you are willing to share a page layout or tutorial let me know.
Drop by soon as there will be giveaways and more happening here in the New Year!! In the mean time if you drop over to MsArtists Mixed Media Playground you will see my New Years Moon Board and my Winter Journal Pages. I hope they inspire you to get creative in the New Year!

Here are the lyrics for Auld lang syne ~ Auld Lang Syne is a Scottish poem, thought to be composed by Scottish poet and lyricist Robert Burns in 1788. It is sung to the traditional folk tune Roud 6294.

Should old acquaintance be forgot,
and never brought to mind ?

Should old acquaintance be forgot,
and old lang syne ?

For auld lang syne, my dear,
for auld lang syne,
we’ll take a cup of kindness yet,
for auld lang syne.
And surely you’ll buy your pint cup!

Heres some recipes for your New Year s Day or any time ~ Simple and delicious! Recipes are via food network tried and love them, they wont disappoint!

Green Salad with Mustard Vinaigrette, Standing Rib Roast and Mashed Potatoes.

Green Salad-

Mustard Vinaigrette: ( serves 4)

  • 1 garlic clove, sliced in 1/2
  • 1 teaspoon Dijon mustard
  • 1 tablespoon balsamic vinegar
  • Small splash soy sauce
  • Salt and freshly ground black pepper
  • 3 tablespoons olive oil

Directions

3 cups mixed salad greens, the darker the better (not iceberg)

Rub the inside of a large wooden bowl with the garlic clove and then either discard it or save it for another use. Put the mustard in the bowl and whisk in the balsamic vinegar and soy sauce (a French secret!) vigorously for about 10 seconds to get a creamy consistency. Season with salt and pepper, to taste. Drizzle in the olive oil as slowly as possible with 1 hand while whisking as quickly as possible with the other hand to emulsify. Lay the salad greens on top of the dressing and toss just before serving. ( I add dried cherries 1 bag, a little purple onion sliced thinly, 1 red bell pepper sliced thinly and fresh tomatoes. This adds color and flavor that you can't beat!)

Standing Rib Roast- (Serves 6+approx)

  • 1 (5-pound) standing rib roast
  • 1 tablespoon House Seasonings, recipe follows

Directions

Allow roast to stand at room temperature for at least 1 hour.

Preheat the oven to 375 degree F. Rub roast with House Seasoning; place roast on a rack in the pan with the rib side down and the fatty side up. Roast for 1 hour. Turn off oven. Leave roast in oven but do not open oven door for 3 hours. About 30 to 40 minutes before serving time, turn oven to 375 degrees F and reheat the roast. Important: Do not remove roast or re-open the oven door from time roast is put in until ready to serve.

House Seasoning: The seasoning mix is more than you need for recipe~

  • 1 cup salt
  • 1/4 cup black pepper
  • 1/4 cup garlic powder


Mashed Potatoes (serves approx 3)
  • Kosher salt
  • 1 1/2 pounds boiling potatoes
  • 1/4 cup milk
  • 4 tablespoons (1/2 stick) unsalted butter
  • 1/2 cup buttermilk
  • 1/4 teaspoon freshly ground black pepper

Directions

In a large pot, bring 2 quarts of water and 1 tablespoon of salt to a boil. Meanwhile, peel the potatoes and cut them into 1 1/2-inch cubes. Add them to the boiling water and bring the water back to a boil. Lower the heat and simmer uncovered for 10 to 15 minutes, until the potatoes fall apart easily when pierced with a fork.

Meanwhile, heat the milk and butter in a small saucepan, making sure it doesn't boil. Set aside until the potatoes are done.

As soon as the potatoes are tender, drain them in a colander. Place a food mill fitted with a small disk/blade over a heatproof bowl. Pass the potatoes through the food mill, turning the handle back and forth. As soon as the potatoes are mashed, stir in the hot milk mixture with a whisk or rubber spatula. Add enough buttermilk to make the potatoes creamy. Add 1 teaspoon of salt and the pepper, and serve hot. To keep the potatoes warm, place the bowl over a pan of simmering water for up to 30 minutes. You can add a little extra hot milk to keep them creamy.

Now what to have for dessert? I always love a good cheesecake! Trader Joes has a great one! Did I say frozen? Only you would know, right? Serve it all with your favorite wine and you have a quick, easy and wonderful meal!

Thursday, December 10, 2009

Holiday Ornament Tutorial

This ornament was printed larger as a door hanger~


Lets get started~
To make any kind of paper ornament similar to this you will need:
(more examples at bottom of post)

* Thin recycled cardboard ( from cracker or cereal box )
* Gesso or white paint
* Images printed on Card Stock or old postcards or old Christmas card images ( 2 locations for free images at bottom of blog if printing your own )
* A bone folder or something to press and smooth with
* scissors and a paper cutter ( or just one of those items )
* brads
* ribbons ( some textured and thicker, some thin for hanging )
* Christmas paper or any other scrapbook paper
* Easy Tack by Krylon
* Wax paper
* pencil for marking cuts if using only scissors
* hole punch
* hot glue gun and glue sticks
* or glue that dries clear
*tweezers
You can see I chose Santa for the front and checker paper for the back side-
I trimmed the edges of the white off the paper for only my image-
Trimmed Santa

Cut cardboard to the same size as the ornament you are making-
I took the checkered paper and allowed for overlay-
I used the bone folder to smooth over edges to front, don't worry the Santa will cover up the front and these won't show! I fold over prior to spraying to have folds made so securing to adhesive is quick and goes smoothly **If your cardboard has images cover with gesso or white paint and let dry or blow dry prior to securing paper on!
I use the paper adhesive to spray on the paper lightly and cardboard! As you can see from the photo below I don't spray the fold over sides until the back surface is adhered!** Ensure your room is well ventilated and that you have wax paper or something protecting your table surface or do it in a garage or outdoors weather permitting!
First I affixed the cardboard to the checkered paper and smoothed it out for no wrinkles, then I turned it over to secure fold over edges: spray edges fold down and smooth out.
Now I sprayed the rest of the cardboard with the folded edges and laid my Santa image on top.
Then I smoothed out the paper securing it to the card board. It dries very quickly. Don't worry if you have a little overhang if you are covering with ribbon, twine or other. If you have overhang and aren't covering with ribbon carefully trim any excess ensuring you aren't cutting too much and getting too far into your image or plan out your ornament for more accuracy- meaning that you have measured and cut equally to start.

You can get seasonal brads from Michaels, Walmart or any craft store-
With your hole punch add a hole where you would like it to hang from- **But adhere any outside ribbon you are adding prior to adding your loop to hang from and then your brad! See below~

I used a hot glue gun and carefully placed the outside ribbon on a section at a time as to adhere it to exactly where I wanted. (You can use tweezers to aid holding it in position to keep from burning your fingers!) After the outside ribbon is attached add your second ribbon choice through your hole and then your brad and you are done.


You may cut out different images ( if you are reselling insure there is no copyright!! ) You may cut different shapes. This is just a basic easy to do ornament for anyone. Including doing it with children if you are helping them~ If you use this tutorial do post an image link to what you have made in the comment section as I would love to see. For images you can find two free image sights at the bottom of the blog! Feel free to share a link to the tutorial with credits to me!
Happy Creating- PS you can do this any time of year with seasonal images!

Friday, December 4, 2009

Christmas Crafts

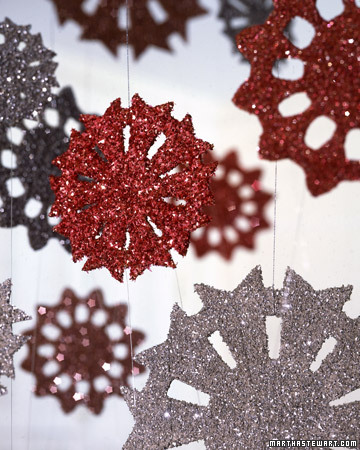
Image via Martha Stewart.com

Hello Crafters I am going to link a few sites with some free tutorials,
printables and such. Hope you enjoy them!

So the queen of crafts always has some must see items and these easy glitter snowflakes are at Martha Stewart~ She even has a video! Well of course she does ;)


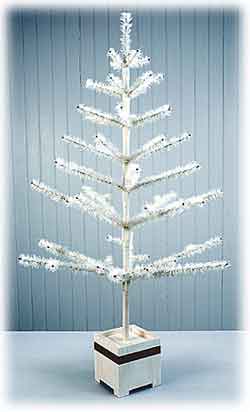
Image via Victoriana.com

Did you ever dream of making a feather tree? I have always thought that they were so beautiful!
Imagine the one above decorated! But who knew they could be so cheap to make??!! $6.00 Check out this how to at Dollar Store Crafts. She has a great image of it done and decorated!
How about a little history on the feather Christmas tree~ Victoriana will make you swoon~

Image via boderlinebonkerscrafts.blogspot.com

Then if you like to make paper ornaments you'll have to drop by CreativitE Erin has a design to lift your spirits and make your fingers get to work.

Here is a video tutorial from ShopChop Suey that shows a similar style that is quite easy to make~

Snow Top Pillow Boxes and Tags:
Over at Creature Comforts she has some printable tags and boxes with directions you can make from another designer Daisy Jane! (Sorry images not available drop over and see them~)

Tuesday, December 1, 2009

Ornaments, gifts and inspiration~

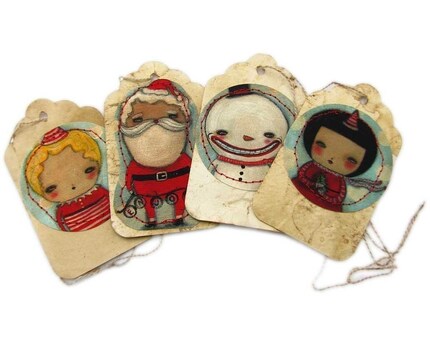
Image via Danita.Art @ Etsy

Ok so you say you don't have time to make those Christmas items like ornaments, gift tags and more. Or you are looking for a little inspiration to get you right on track well one of my favorite folk artist's is Danita! She has an Etsy shop filled to the brim so take a peek at her work and you will fall in love too! Danita Art hop on over and I guarantee that you won't want to miss a purchase of one of these fine folk art work pieces~ Swoon! For the season~
Don't forget to stop by for more links to inspiration, arts and crafts through out the season~

Saturday, November 21, 2009

Banana Bread & A Gourd Ornament Tutorial


I was unable to post my favorite ornament and how to yet due to my daughter getting sick.
Here is a link to a wonderful tutorial on gourd ornaments. Festive Gourd Ornaments


As far as one of my favorite recipes ~ It has to do with baking. No not pumpkin pie, but something you can make for those cool mornings Banana Bread:

Ingredients

  • 2 cups all-purpose flour
  • 1 1/2 teaspoons baking soda
  • 1/2 teaspoon salt
  • 1 teaspoon cinnamon
  • 3 or 4 overripe bananas
  • 1 cup sugar
  • 3/4 cup (1 1/2 sticks) unsalted butter, melted and cooled
  • 2 large eggs
  • 1 teaspoon pure vanilla extract
  • 1/2 cup pecans, finely chopped
  • Confectioners' sugar, for dusting

Directions Preheat oven to 350 degrees F and lightly grease a 9 by 5-inch loaf pan. In a large bowl, combine the flour, baking soda, cinnamon and salt; set aside. Mash 2 of the bananas with a fork in a small bowl so they still have a bit of texture. With an electric mixer fitted with a wire whisk, whip the remaining bananas and sugar together for a good 3 minutes; you want a light and fluffy banana cream. Add the melted butter, eggs, and vanilla; beat well and scrape down the sides of the bowl. Mix in the dry ingredients just until incorporated; no need to overly blend. Fold in the nuts and the mashed bananas with a rubber spatula. Pour the batter into the prepared loaf pan. Give the pan a good rap on the counter to get any air bubbles out. Bake for about 1 hour and 15 minutes, until golden brown and a toothpick inserted into the center of the loaf comes out clean. Don't get nervous if the banana bread develops a crack down the center of the loaf; that's no mistake, it's typical. Rotate the pan periodically to ensure even browning. Cool the bread in the pan for 10 minutes or so, and then turn out onto a wire rack to cool completely before slicing. Toast the slices of banana bread, dust with confectioners' sugar, and serve.

So I hope this holds you over to my next post~ Happy Baking~Thanks for stopping by!

Thursday, November 12, 2009

Handmade News !! Lets get cooking!!

Image via Food Network


I think this is a great time to share recipes and how to create your favorite holiday ornaments.
I will be posting mine in the next day or two. Please leave a comment when you visit with your favorites and your email address. ( I promise not to share! ) I will contact you with contact information to get your recipes and/or ornament ideas then I will include it in the post!
I will post favorites on Friday Nov. 20th pm for viewing on Saturday Nov. 21 am! Just in time for your Thanksgiving meals! And breaking out your ornaments!!

Here is a great website to look for articles on how to or for some great craft information.

Don't forget to grab your favorites and contact me! Or if you have it handy just add it in your comment. Looking forward to seeing your favorites!

Saturday, October 31, 2009

Happy Halloween ~


If you would like to see a short Halloween story with a few more digital art works go to Msartists Mixed Media Playground~ just click the link on the side bar and it will take you right there!


Friday, October 30, 2009

Last Minute Halloween

Image from NY Daily News / Martha Stewart

At AllFreeCrafts.com you are sure to find some great ideas and tutorials for Halloween. Easy to do for last minute fun while waiting for the dark with the kids!

For all you bloggers out there you must drop by Confessions Of A Soccer Mom ! She has some spooktacular things on her blog. The 31 days of Halloween, recipes, domestic witchery, links to awesome Halloween fun!

Also stop by Msartist Mixed Media Playground (my alter ego) for some Halloween art and on Nov. 2 to see a Dia De La Muerta mixed media art work and blog post!

The queen of Halloween Martha Stewart~

Thanks for stopping by~ And come back to see the season change here at MsartistSewCrafty we will be having lots more going on. I have some guest coming with tutorials and more! Remember we are just getting started! ~

Monday, October 26, 2009

Costume Ideas

Are you looking for costume ideas still ?!
There is still time to gather your goods and be ready!
Here are a few ideas and links to make you a creative costume connoisseur ~

Blood Lust Vampire~via SistersOfTheMoon

Mother Time~via dirtybirdyvintage


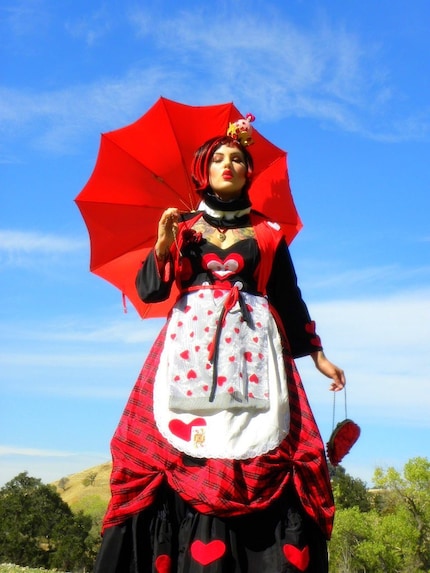
Bride of Frankenstein and Queen of Hearts~via dirtybirdyvintage

Witches Hat~ via Mermaiden Creatio

Monday, October 19, 2009

Halloween Freebies and Fun


Here's a link to some Halloween freebies from Inspire me Thursday~ Check out their site of inspiring prompts each Thursday. They are also on twitter.
I can't believe I missed the Halloween Party this year! But it had been storming and our fence blew down on one side and other such brewing that kept me from participating in a great blog party. But you should go on over to Vanessa's A Fanciful Twist and see all the links of bloggers that are participating in her blog party. You are sure to have a howling good time!


Thursday, October 8, 2009

Dog Halloween Costumes


Looking for Halloween costumes for our pets I came across
this bulldog in the greatest costume!
It seemed to fit his personality to a tee!
The great thing about this costume is that It is good fitting
without being too tight fitting around his neck. Also It has no
choking hazards. The fabric seems lightweight
which will not to overheat the dog. And he can see and
breath with ease in this costume. Also
think about i if you walk around with your dog at night
have a reflective leash and collar.

Heres a couple of videos I came across that have lots of ideas for costumes for many sized dogs!


Wednesday, October 7, 2009

Halloween Crafts


Here is a link to Kristine McKay's website For other crafty fun and ideas ~ http://www.kmckaydesigns.com/ Don't forget to stop back by for some more Halloween inspiration and ideas! ~ There is still plenty of time to get in the spirit ~

Tuesday, October 6, 2009

Some fun is brewing~

Halloween Party


I have been stirring the kettle, there is some fun brewing up right here for you~ So be sure and check back often as we are just getting off the ground. We will have some guests with links to their sites and stores. Also links to some special Halloween parties, web sites and other goodness that you may want to join in on! Crafting and much more~

Calling all crafters! Want to be a guest here or have a project you want to post with me~
Just leave a comment below with your email address and send me an email with a description of craft post or store you want featured and we can work out the details!

Monday, October 5, 2009

Welcome to my tips and tutorials blog~

~Welcome~
I wanted a place where I could give you some free tips, patterns and crafty inspiration. I love dabbling in crafts and sewing. I wanted to keep my mixed media art work and journal work separate. I also wanted to share some Holiday themed crafts and have a bit of fun with that! So I hope you enjoy the combination of fun and free! I will also be sharing crafty sites I love and give aways! If there is anything you are interested in that you don't see~ email me and I will reach into my hat and do a post for you or steer you to a site that has tips or tutorials in that area if I don't have it! I can't wait to share more~

Halloween Candy Bag Tutorial Steps 1& 2


You can make your own pattern out of pattern paper, tissue paper, tracing paper or if you are like me and don't have any I used the "thrifty method" of using newspaper.


Go to the list for needed pattern cuts and measurements*
Top, Sides and below them bottom - You can make this any size as long as you add for seam allowances.

( 1 yard fabric needed, thread and grosgrain ribbon 7/8 ")

Here are my measurements for the larger bag:

1. For handles 2 pieces of fabric cut 4" wide x 25" long
2. For front and back of bag 2 pieces of fabric 12" wide x 14" long
3. For sides 2 pieces of fabric 6" wide x 11" long
4. For bottom of bag 2 pieces fabric 14" wide x 6" long

Make sure you allow the same amount of fabric for your seam allowances~ So if you use 5/8" add that to all your measurements.

With 1yard of fabric you will have left over material. I used mine for making bean bags. I will post an easy tutorial for that later. If you do the smaller bag you would have enough fabric left over for a Halloween pillow.


Step #1. Cut the fabrics listed above adding your seam allowances. Then press your seams over 5/8" or slightly more as long as you use the same measurement for folds on all fabric.


#Step 2. Next you will be sewing all your finish seams prior to assembly of the bag. Your finish seams to fold over, iron in place and sew are: The tops of the bag both pieces front and back and the top of both the sides of the bag.


Halloween Candy Bag Bottom Steps 3 & 4

Steps 3 & 4


Directions under picture~


Image - Turned and ready to top stitch which closes turning hole~

Image - right sides together and sew leaving 2" hole

#1 With right sides together match your fabric and stitch all the way around leaving a 2" opening for turning. Do the opening in the center and not on the corners. This will allow your corners to be clean. When doing your corners
#1b (tip) sew across the fabric when you reach the corner leave your needle in and lift the foot of the sewing machine and pivot to your new direction. Continue to sew until meeting your opening leaving a 2" gap for turning.
#2 Turn your fabric inside out. Clip the fabric at the corners on a diagonal.
#3Take it to the iron and press it flat.
#4 Go back to the sewing machine and top stitch the entire piece which will close the hole and give it a bottom finish~
Cath Kidston